Skip to content

Jared and Tabitha's Bearhawk Construction Log

The story of N805TB

Menu
  • Bearhawk Flight Training
  • Recent Posts
  • Search
  • Welcome to Our Building Log!
  • Privacy Policy
Menu

Nicopress Check and Firewall

Posted on November 5, 2009November 27, 2009 by Jared Yates

Since I’m finally caught up on inventory and counting for a while, I spent some time checking nicopresses. I checked each one with a go/no-go guage and marked the good ones with a green sharpie. They are all good, but that will help me remember to check in case I find one that isn’t green later (because I missed it today). I also spent some time looking over the door skins and counting rivet holes. I think I’m going to try to use pop rivets to hold the frames to the skins and to hold the windows in.
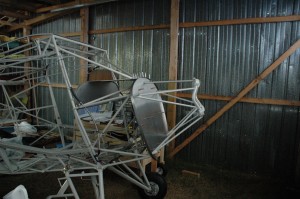
Engine Mount in Place

I started working on the holes for the firewall, which included drilling the top and center fuselage hole to the correct ID and drilling the hole in the stainless to match. Back when Richard was working on the airplane, the Avipro 360 mount only had 4 legs, so he didn’t want to drill the hole, quite wisely. With the holes large enough to hold a -6 bolt I set the engine mount in place, as you can see in the picture.
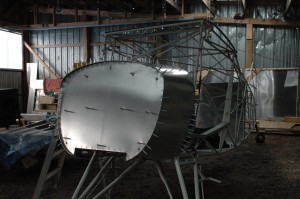
Firewall and Boot Cowl

I wanted to make sure that the firewall was in just the right place before I started marking to cut the holes, so I clecoed the boot cowl parts in place. Richard had already drilled them, so the cleco work went pretty quickly.
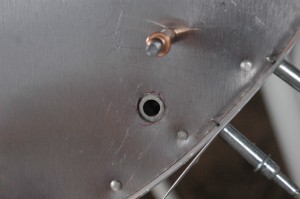
Firewall Hole to Clear Engine Mount
Here is a picture of one hole, looking from the firewall side. It was somewhat tricky to get the holes in the right place, since they need to match the footprint of the engine mount but need to be located with reference to the fuselage (and because the engine mount doesn’t hold itself in place to match the fuselage). I attached the engine mount to the fuselage with the stainless between the two, then traced the outline of the engine mount footprint with a very fine sharpie for all 5 lugs. I removed the firewall and used a unibit and then a round file to cut to the line. From there I put the engine mount on a table face down and set the firewall on top. This allowed me to check the fit of each lug, but just one lug at a time. The firewall holes don’t line up with all of the engine mount lugs at once, but they don’t really need to. for this operation. I had to go into work after lunch so I wasn’t able to finish all of the holes, but I got a good start.

Leave a Reply

You must be logged in to post a comment.

Navigation

  • The Most Recent Posts
  • Posts about Building
  • Posts About Flying
  • Commentary Posts
  • Bearhawk Flight Training
  • Buy Your Own Bearhawk Kit!
  • Our Bearhawkstore.com
  • Meet More Bearhawk Builders
  • Privacy Policy
© 2025 Jared and Tabitha's Bearhawk Construction Log | Powered by Superbs Personal Blog theme