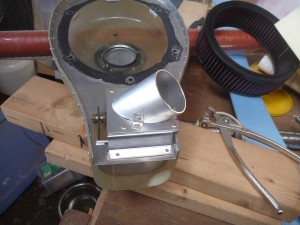
Our little airport is going to be a great place to base our Bearhawk, in part because it is really close to the house. It’s a small airport though, and not really well suited for a safe first flight. As such, the plan has been to move the airplane to the municipal airport about 5 miles to the north for final assembly. Today I worked on a few remaining jobs that are easier to do here, and spent some time meeting with the folks at the big airport to finalize our hangar spot. After a lunch break I came back to work on more final items, starting with the carb heat inlet on the airbox. Here’s the arrangement that I came up with:
The duct for the right side cabin air vent was really in the way of the electrical distribution panel, but I thought I was going to be able to make it work. After a few different attempts, it became clear that this wasn’t going to be the case. The easiest corrective action at this stage was just to move the vent down a few inches to clear the panel.
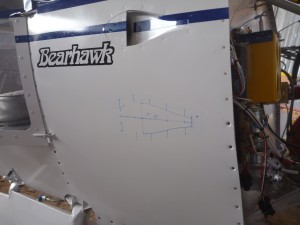
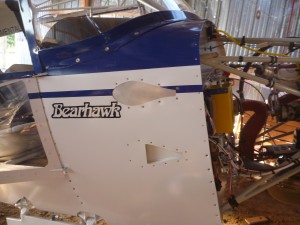
After locating the hole with great precision and accuracy, I cut out the aluminum section and riveted the vent into place with blind rivets. I used washers on the back of the blind rivets to help spread the load out on the plastic vent, instead of making an aluminum ring like I had for the first vent. I also made an aluminum blank to cover the old hole, and next time I do some painting I’ll drill the rivets and paint this piece to match the rest.
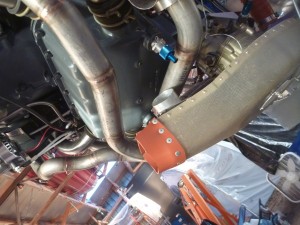
Next I installed the font seat seatbelts. They went in exactly as they were supposed to. I installed the two-piece stainless shields on the firewall where there were grommets, and made a rubber sealing strip to go on the front of the filtered airbox.
I added the remaining belly panel for easier transportation, and installed the prop. I didn’t set the final torque on the prop yet, in part because I have an interference problem with the cowl that I didn’t expect. Installing the prop sure is a pain in the rear, though the special wrench did help some.
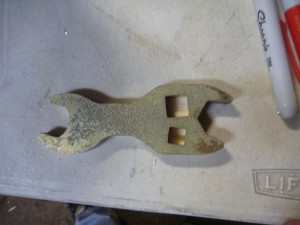
I got the wrench from Anti-Splat Aero, and it probably saved about 45 minutes on the job. I was still able to get the cowl on, though it was rubbing the spinner on the top of the junction.
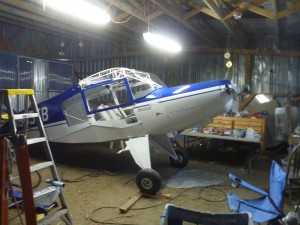
I installed the ELT antenna on the top of the rear fuselage, and used wire ties to secure the coax all the way down to the ELT. I also used temporary ropes to secure the flap cables and the electrical wires that go out to the wing root. From there all that was left was to load the fuselage up on the trailer and drive away! You can be sure it was much easier to say than to do. Fortunately, I had some help from Tabitha. For all three wheels to sit on the ground, the trailer would need to be 18 feet. Mine is 14 feet, which means that it goes from the main wheels to the handles on the fuselage. The trailer has a gate on the back, which we left in place initially. We rolled the mains onto the ramp, then hooked up big ratchet straps to the main landing gear. I disconnected the trailer from the truck so that we could tilt the whole thing back. This allowed the ramp to sit flat on the ground. Then I advanced the ratchet straps until the mains were up over the axle. Once there, we were able to set the tongue of the trailer back down to the normal height, and push the fuselage by hand up to the front of the trailer. Once there we detached the ramp, since it was going to be too tall to fold up. My plan had been to build some wooden shoring to keep the tail up, by running a board under the handles. What I didn’t realize is that the stringers protrude down below the handles. I was pretty sure that they didn’t, but I was wrong! Tabitha came up with the idea that we ended up using, and she called it the hammock. We set a saw horse on each side of the fuselage, as far back as we could. We stabilized those saw horses with diagonal braces fore-aft, horizontal braces across the front, and one long brace across both in the back.
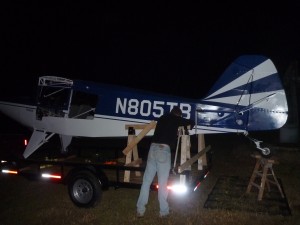
Then we ran straps from the outer edges of the trailer bed, up over the saw horses, and then to the handles. These carried the weight of the tail sort of like a suspension bridge. Then we ran a big strap over the top of the whole contraption to hold the tail down. I used large ratchet straps to hold the main wheels in place, and made control locks out of bolts and very large washers. I installed those on the counter balance areas of the elevator and rudder. One should note that it’s not really prudent to carry the fuselage on a trailer with the horizontal stab and elevator in place. The span of the stab is 10 feet, and in my state (and probably yours too) the max towing width is less than that by a little. This was part of the reason that we conducted this big move in the middle of the night. The more important reason was that we wanted to minimize the number of other cars on the road, both for the safety of the cargo, and as to not create too much of a spectacle. Here it is all ready to go:

We stationed Tabitha and sleeping Felicia in a car in front, then Alan brought up the rear in his truck. Tabitha’s job was to scout out oncoming cars so that I could pull off of the side of the narrow two-lane roads. I only had to do this a time or two. Alan’s job was to make sure that the load remained secure. We briefed to establish communication methods for all of these roles, and proceeded very carefully to the other airport. When we got there, Jim came out to help with the unloading. Here is the result:

To say the least, it was a nerve-wracking experience that I hope I’ll not have to repeat.