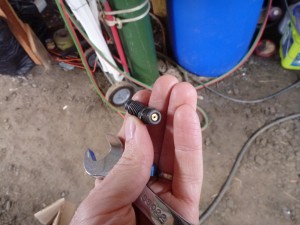
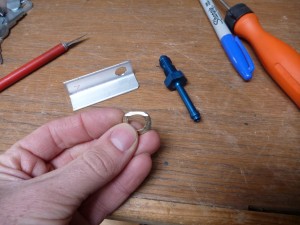
In the last episode we left off with a failed attempt to get the manifold pressure from the engine to the sensor. Today was more successful, thanks to some inventory from hangar neighbor Danny. He had one of these fancy restrictor fittings that will go in there nicely:
The idea behind using a restrictor here is that if the line between the cylinder and sensor fail, it will create a vacuum leak for the number 3 cylinder. The restrictor reduces the size of the leak from a 1/4″ hole to a .040″ or so hole. The larger hole would likely lead to some engine roughness, but the smaller hole probably would not. To get that fitting in, I had to disconnect the oil line:
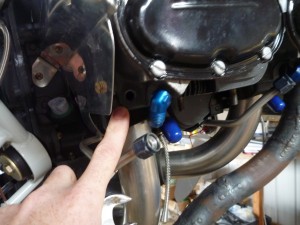
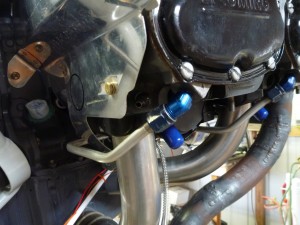
That fitting is a 37-degree flare fitting, and I need to end up with 1/4″ tube. The best idea that I could come up with also solves another problem, which is how to bend the hose around the relatively steep corner and keep it clear of the cowling. I used 1/4″ 5052 aluminum tube to make the first 6″ or so of the line, then used an angle bracket attached to the baffles to change over to a 1/4″ Tygon hose.
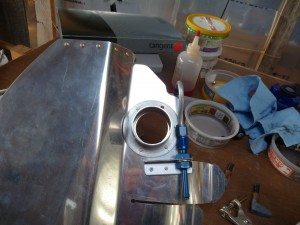
The only bad thing about this plan is that the area where the bracket will attach is where I was also planning to put a 2″ hole to bring air into the exhasut muff for carb heat. The solution was to move the hole over to the right instead. By having the hole low in the baffles, it helps pre-heat the air as it flows over the cylinder fins.
All was well until I reinstalled the baffle and realized that I had put the port right next to the intake area, where there aren’t any fins, and there probably won’t be very much airflow.
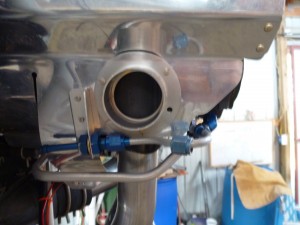
So I patched the hole with an aluminum piece, and I’ll make a new hole up above the cylinder later.

Next I mounted the manifold pressure sender, near the top of the firewall and slightly to the right. This high location will help any liquid contaminants drain back towards the engine. I finished up a few other items that were outstanding, like supporting the prop control.