Skip to content

Jared and Tabitha's Bearhawk Construction Log

The story of N805TB

Menu
  • Bearhawk Flight Training
  • Recent Posts
  • Search
  • Welcome to Our Building Log!
  • Privacy Policy
Menu

Fuselage Covering

Posted on September 7, 2012April 28, 2013 by Jared Yates

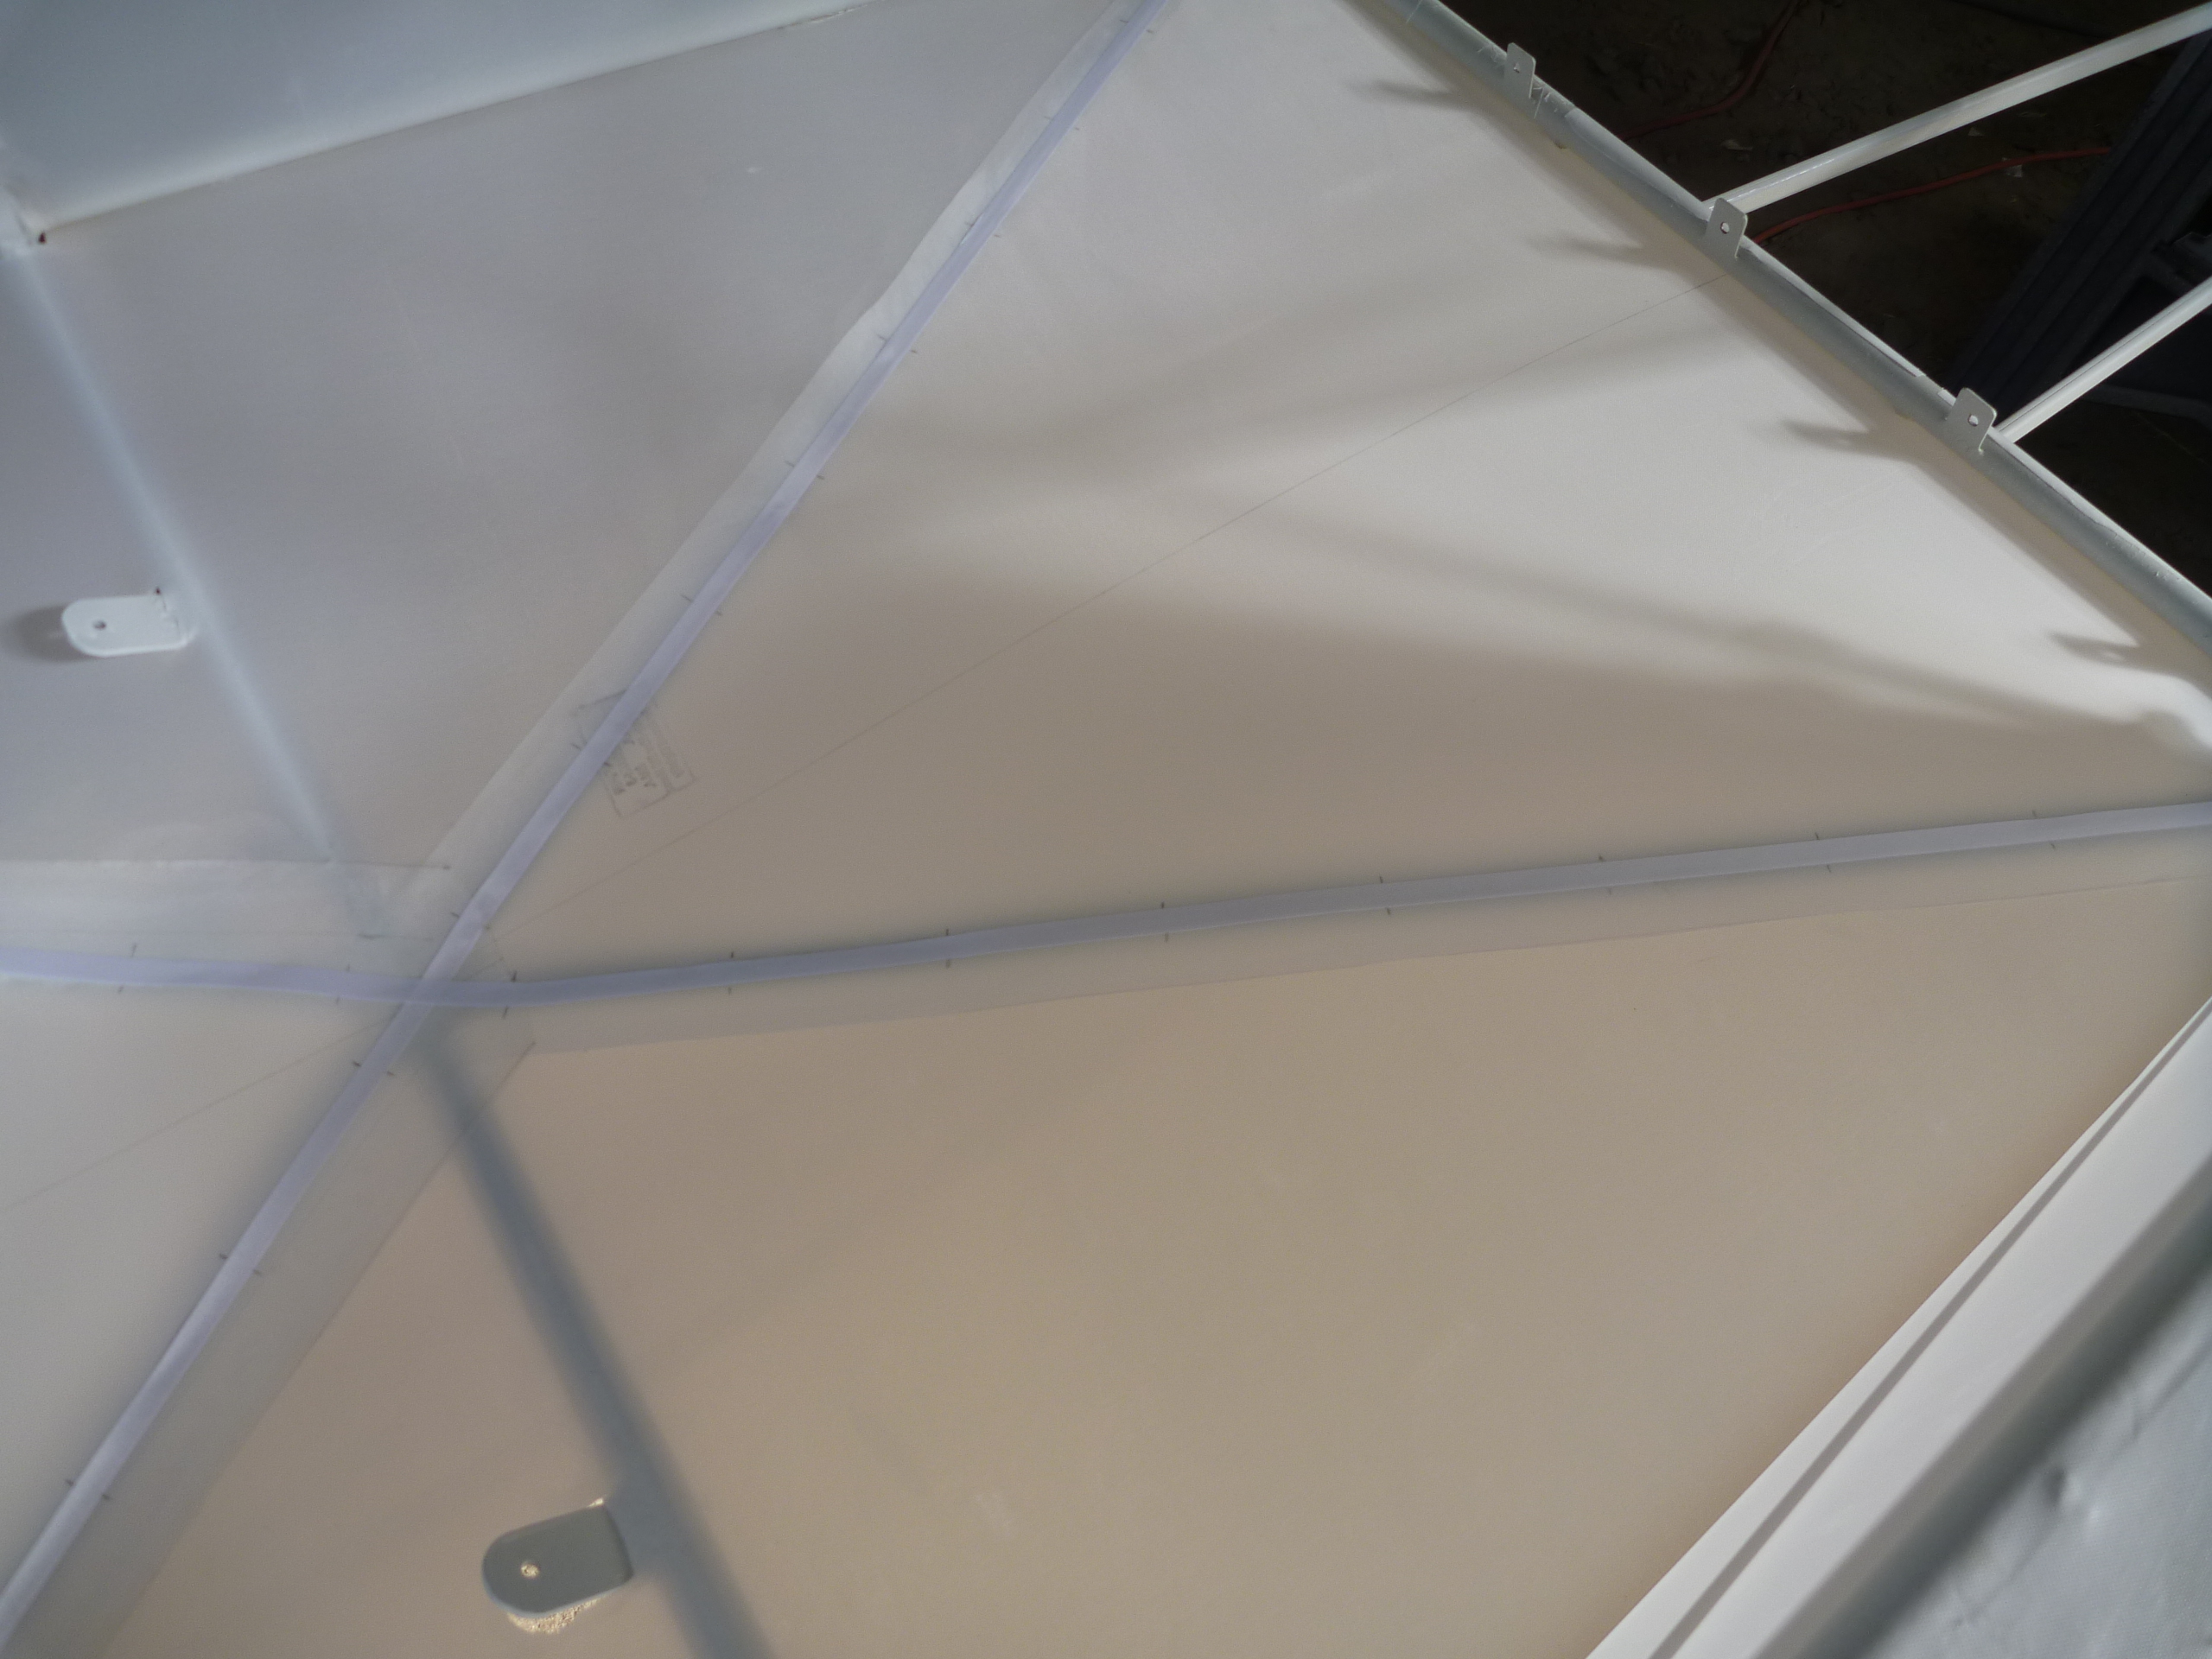
This morning I finished cementing the belly fabric in place. I shrank the fabric to 225 degrees and it looks much better.

Shrunk Belly Fabric
Shrunk Belly Fabric

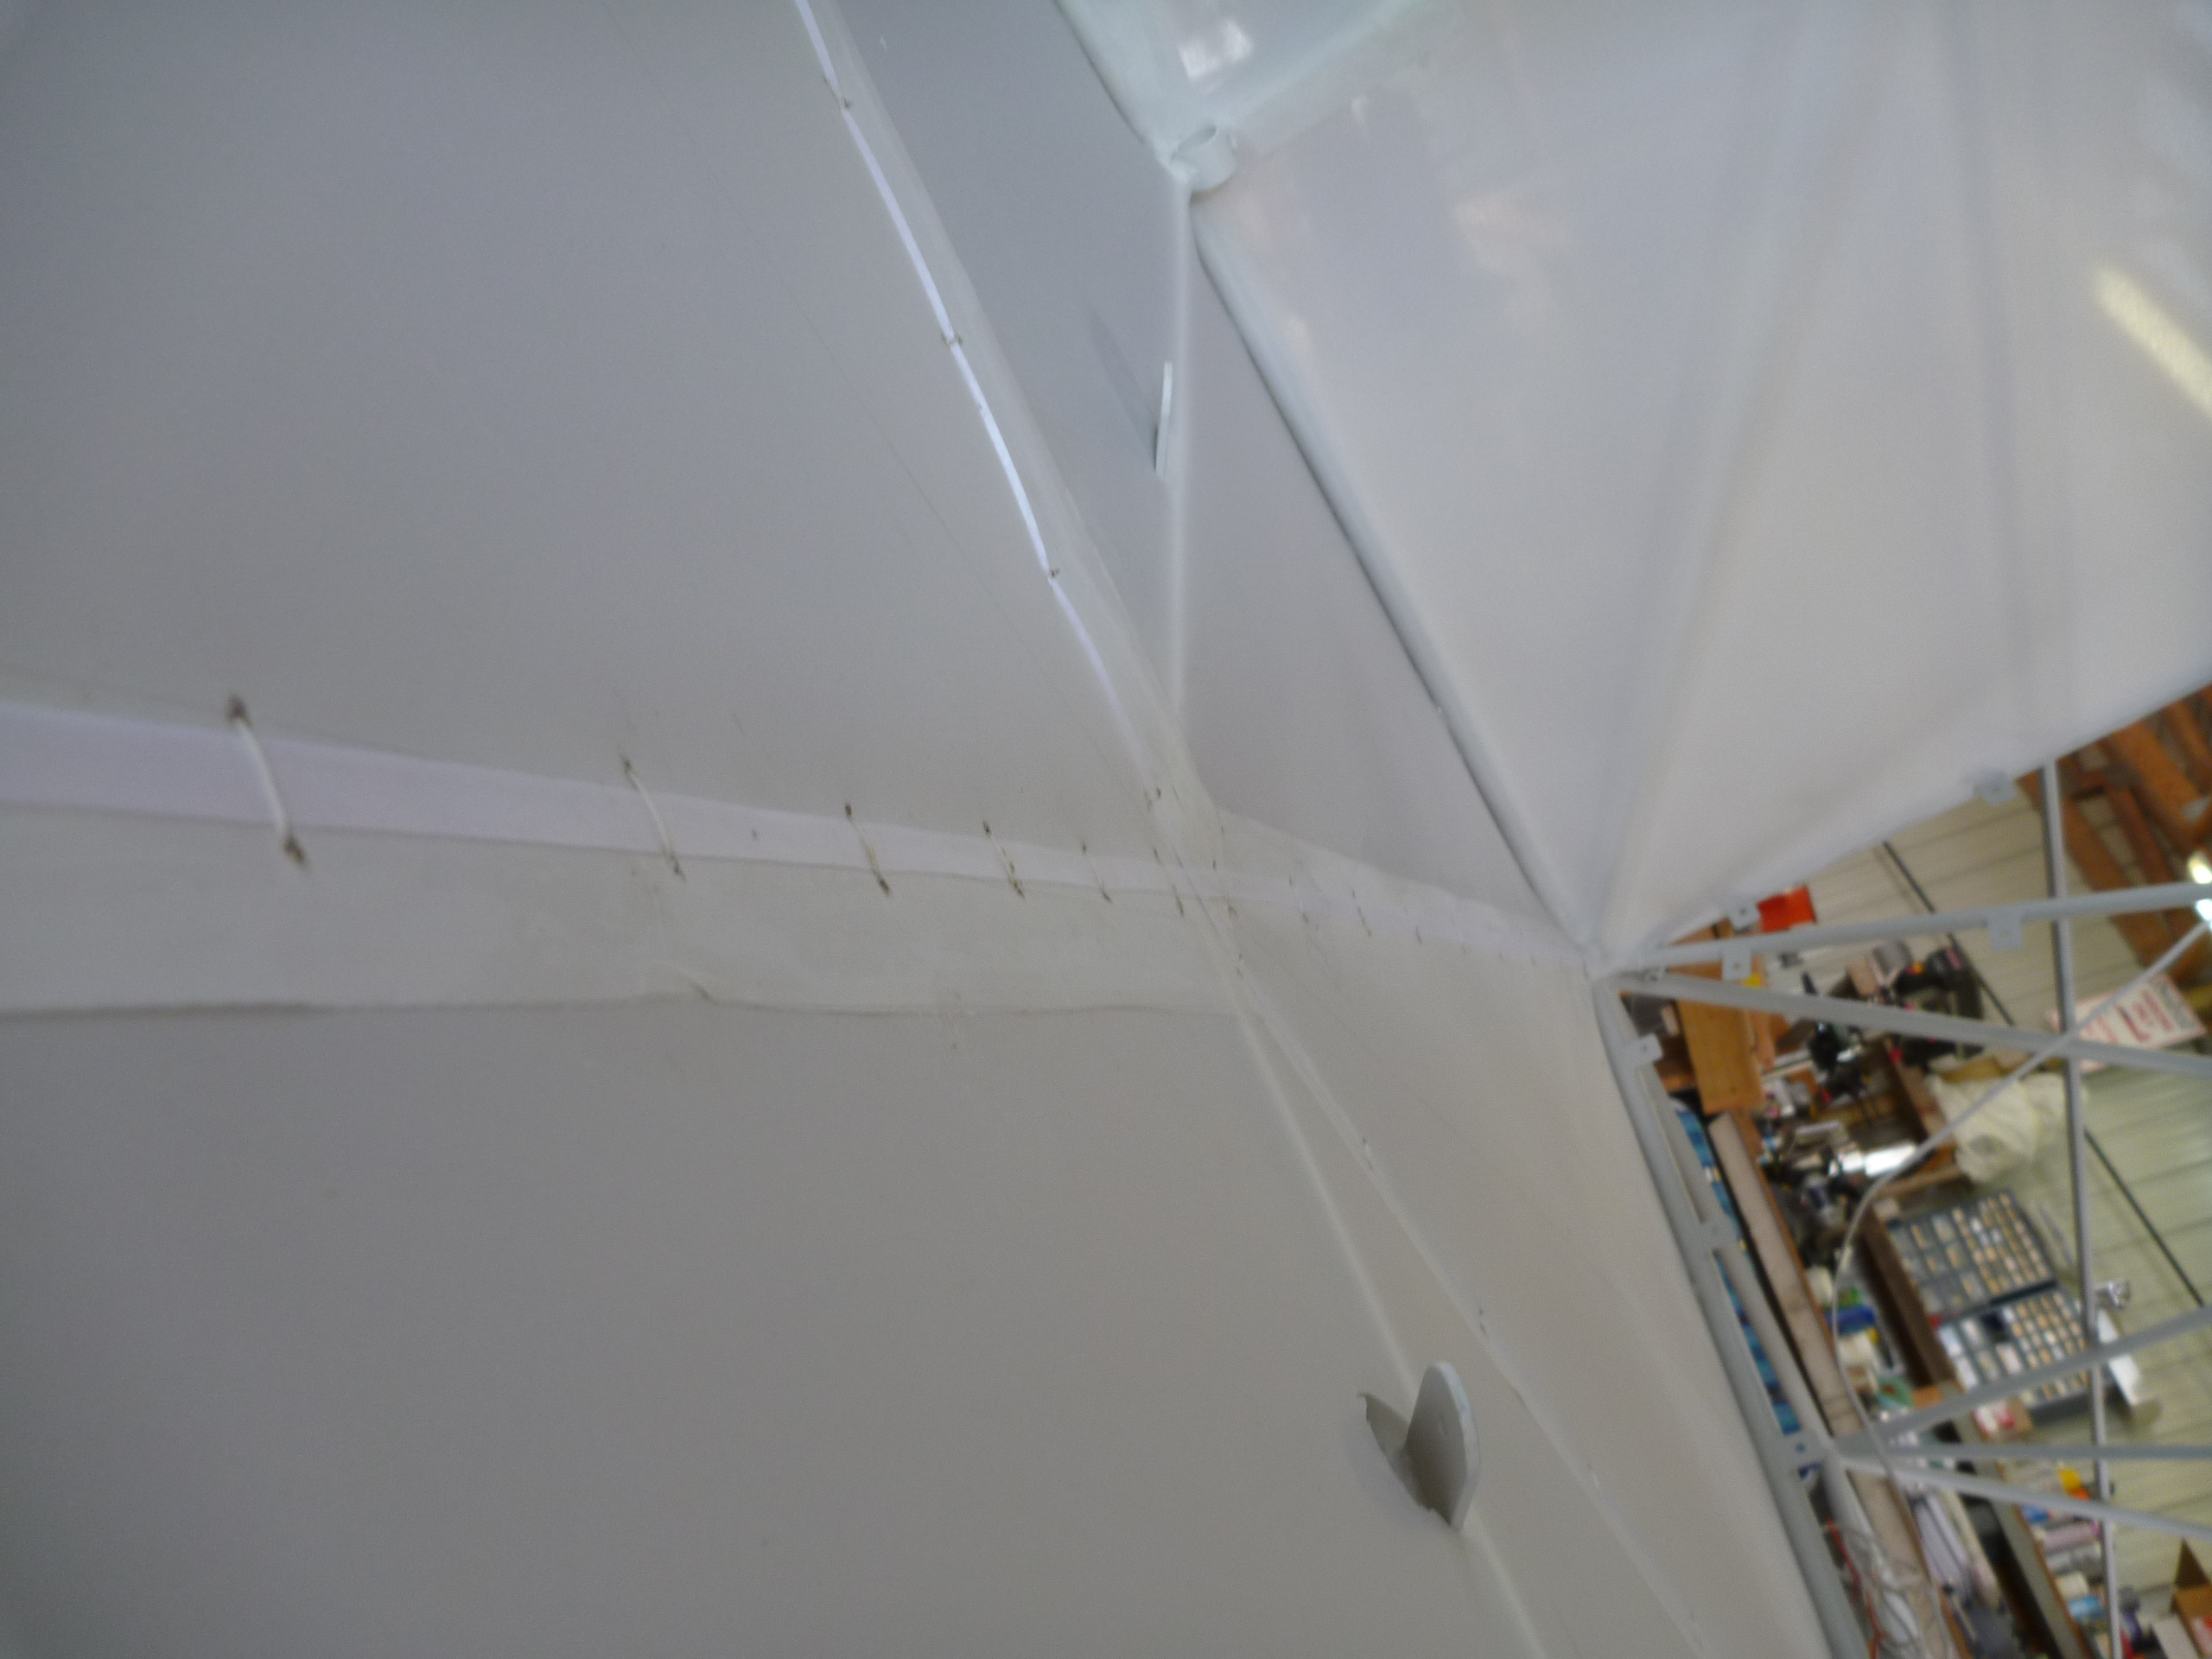
With the distractions of the rest of the fuselage hidden by the fabric, I see that the stringers aren’t quite straight. I probably managed to bend the standoffs a little while handling the fuselage. At this stage it was easy to fix- I just reached in from the sides of the fuselage and gave the stand-offs a little tap with a hammer. That made the stringers look much better too. Next I added the rib stitching to the cabin roof:
Reinforcing tape in place, stitch holes punched

Stitching in place
Stitching in place

Here's another shot from the nose to show the progress.
Here’s another shot from the nose to show the progress.

I left the area behind the tailwire attachment point open to allow for airflow in the fuselage. To help deter mice and the animals that eat mice from getting in through that opening, I added a swatch of window screen.
Tail vent hole
Tail vent hole

Looking up at the inverted fuselage

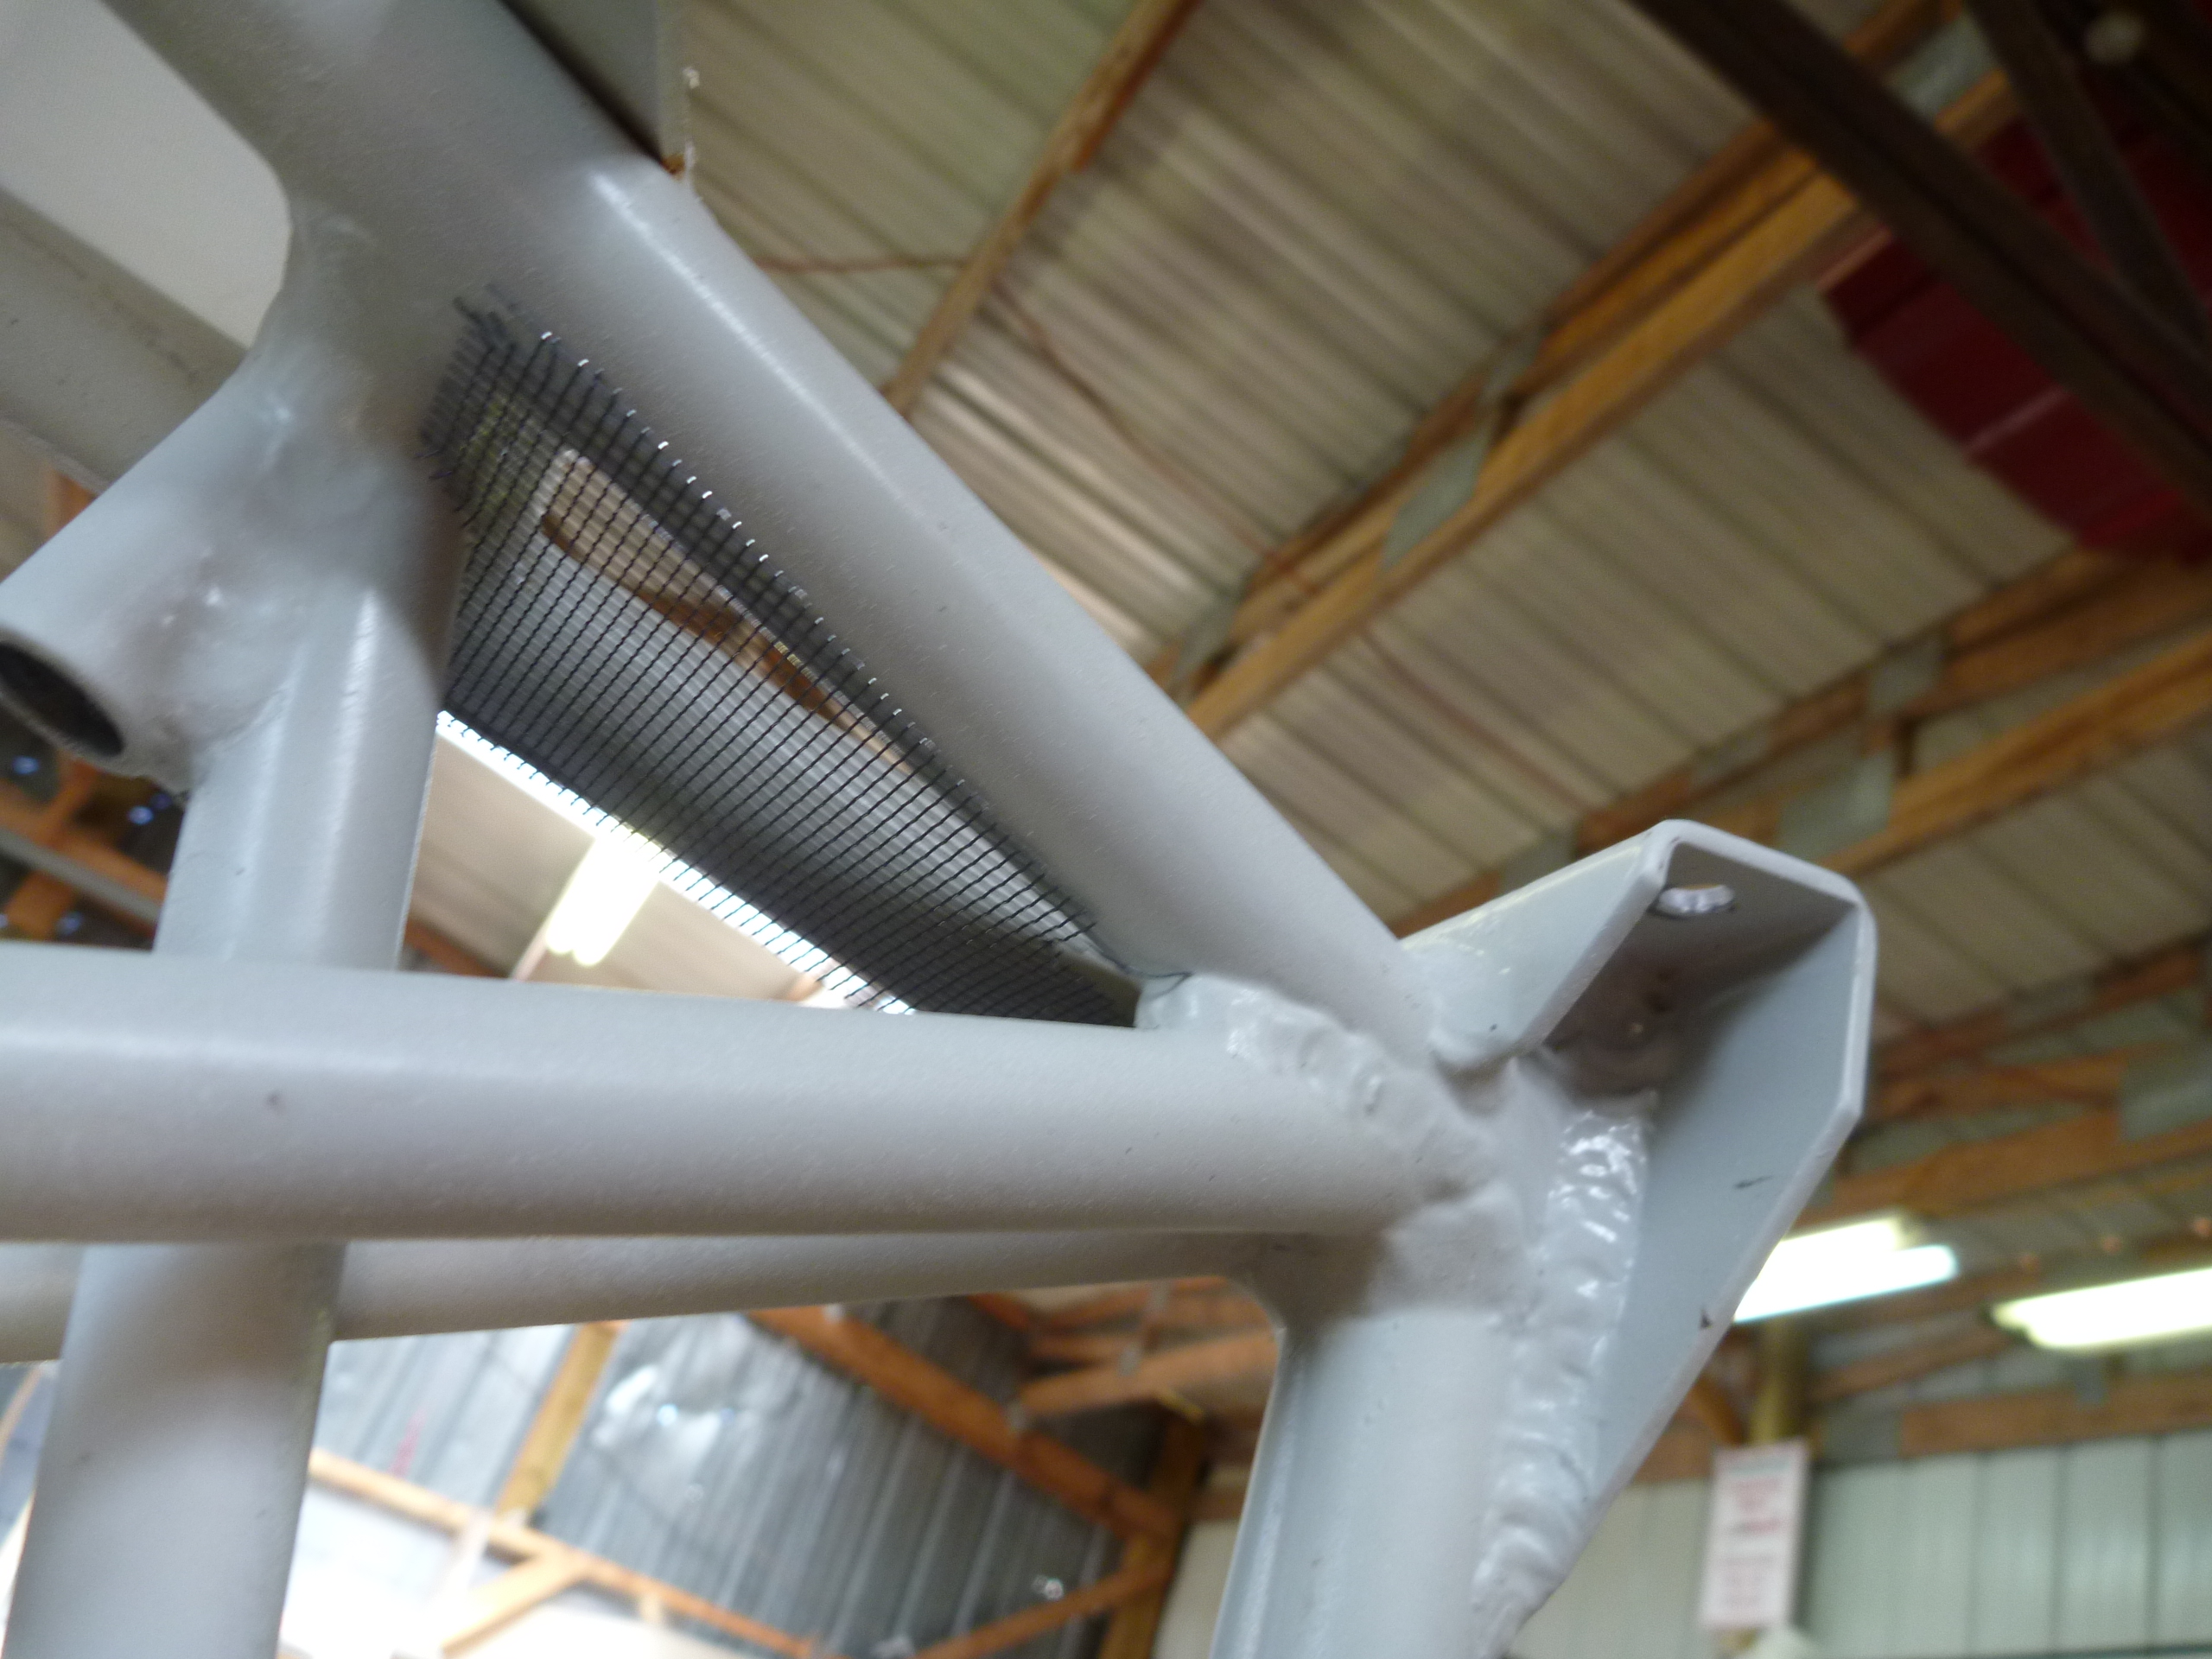
I used a little dab of fabric cement to hold the screen in place.

Leave a Reply

You must be logged in to post a comment.

Navigation

  • The Most Recent Posts
  • Posts about Building
  • Posts About Flying
  • Commentary Posts
  • Bearhawk Flight Training
  • Buy Your Own Bearhawk Kit!
  • Our Bearhawkstore.com
  • Meet More Bearhawk Builders
  • Privacy Policy
© 2025 Jared and Tabitha's Bearhawk Construction Log | Powered by Superbs Personal Blog theme