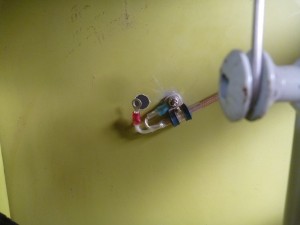
I needed to finish up a few more jobs before I could put the left tank back in. One was to install the Dynon OAT probe and reconnect the wires. Another was to get the end of the antenna lead sorted out. I have plans to mount an antenna on the left wing that will be dedicated to a handheld transceiver, which will be our backup and second radio. Since that antenna is the old style with the ceramic insulator, I installed the feed line and end termination while I still had good access with the fuel tank out. I stripped the coax and removed about 2″ of sheild, then crimped a ring terminal onto the shield. I crimped a second ring terminal onto the center conductor. On the top wing skin, I used a #8 screw to attach the shield terminal to the skin, but I also ran the screw through an adel clamp that supports the whole coax. This will hopefully help ensure that the ring terminals won’t have any strain in service. In case that doesn’t make any sense, here’s a picture that probably illustrates it much better.
With those jobs done I reinstalled the left tank and reconnected the fuel lines that run through the inboard bay to the fuselage. While I had the sight gauges apart to replace the tubing, I also installed a restrictor in the bottom fitting of each. Much like in the manifold pressure line, I used a rivet and secured it with JB Weld. Once the epoxy cured, I trimmed the head of the rivet very slightly so that it would clear the flange on the tube, then drilled a 1/16 inch hole in the middle. This small hole will help reduce oscillations in the indication, and more importantly, will slow the rate of leakage if the sight gauge fails. The smaller hole will hopefully buy an extra 15 or 20 minutes to get the airplane on the ground at an airport instead of on a dirt road, in the unlikely event of a gauge failure. I’ve also mitigated the risk of failure by keeping the gauges outside of the cabin area, so that the fuel will be less likely to end up on me in case of a leak.
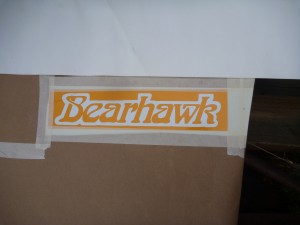
Since the boot cowl blue paint was mostly cured, I prepared it for the black paint. The area under the windshield will be flat black, in the same Rustoleum that I used on the instrument panel. I also applied the Bearhawk logo to each of the side boot cowls. This was the first time for me to try using the paint masks that I sell at BearhawkStore.com. I probably should have tried them earlier to be sure that they would work! Here is the preparation. I applied the yellow portion, then masked off the surrounding area.
Then I wiped everything down with C2210, let that evaporate, and sprayed gloss black rattle-can paint.
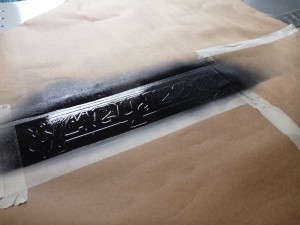
After that was mostly dry, I removed the outer masking paper, then removed the perimeter portion of the paint mask. I started removing the middle of the letters, but thought I should probably take a picture of the process.
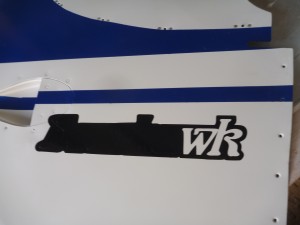
159- Finished Logo
The masks worked very well, and I don’t just say that because I sell them. It was really a trouble-free process, and now I have a painted-on logo that will hopefully outlast any vinyl alternative. While I was waiting for the paint to dry in the previous steps, I took out the right fuel tank and gave it the same treatment as the left.
Yesterday I showed a picture of the alternate air control mounting bracket. I made it out of a scrap of fairly thick aluminum, probably close to .060 inches. Being used to much thinner material, I underestimated the bend radius and broke it right into two pieces when I tried to bend it. So not unlike the real California, it’s broke.
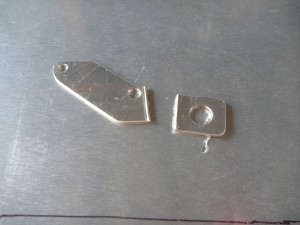
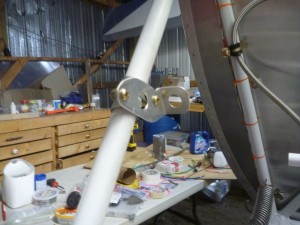
I made another one out of .035, which I think will be plenty rigid. Here is how it is supposed to go:
Last night I bent the new roof piece, so today I finished the bend with the dead blow hammer. I installed the roof piece and drilled holes in it for the GPS antenna. I sanded the filler on the left wingtip again, and left the hangar before midnight. Can you tell that the girls must be out of town these days?