I should add some background information here about why I would want to mess up a perfectly good set of Avipro seats. In my research about how to make safe seats, I read about how important headrests are. Most pilots and builders that I talk with about this disagree. They say that most impacts in airplanes are down and forward, and that headrests are included in cars for rear-end protection. Others seem to approach crash safety from the point of view that seems to imply that they really don’t care, since they probably aren’t going to crash, and if they do, then they probably aren’t going to survive.
The whole safety discussion is one to approach with care. The way to make any airplane as safe as possible is of course to not fly it. This extreme end of a spectrum can be juxtaposed with the other end of the same spectrum, which is something like the latter pilot opinion above. The middle ground has several optional stopping points, and the end decision is a compromise between improving the odds of survival in an unplanned acceleration and being able to operate a useful and affordable airplane. While it’s easy to set out to build the safest airplane possible, each proposed safety feature has at least four costs: weight, expense, building time, and impact to useful operation. The final airplane configuration certainly reflects the builder’s willingness to pay on those four counts, and coincides with his understanding of the cost/benefit ratio of each feature.
For me, there are several safety features that I’m choosing not to incorporate, simply because the 4 costs above don’t outweigh the potential gain. One example is a Ballistic Recovery System, like the parachutes on Cirrus airplanes. Including a BRS would require redesigning the fuselage, spending tens of thousands of dollars on the equipment, and adding weight and recurring maintenance tasks to the finished airplane. In the event of a mid-air collision or structural failure, a BRS would certainly be nice to have, but for me the odds of those events happening are slim enough that the potential benefit of a BRS isn’t high enough to justify all of the costs.
One safety feature that I do plan to incorporate is 5-point seat belts for all 4 passengers. Some people feel the same way about seat belts as I do about a BRS; I think it’s interesting to see how other builders position themselves on this spectrum of safety. I know of one builder who feels fine with a single lap belt for both rear passengers to share- and he is a very informed and experienced airplane builder and pilot. My point of view is certainly influenced by my own past experiences, which include surviving (without serious injury) a forced landing and two serious car wrecks, among numerous other less notable but similar events. I believe that it takes first-hand experience of the kind of accelerations involved in an event like that to really appreciate the forces and the complete inadequacy of the occupant to do much of anything about restraining himself with his own strength or actions. I’m convinced for sure, so for me the seat belts are an easy decision. I don’t want to imply that another builder is wrong because he finds himself in a different place on the spectrum, but I might take all of that into account before I ask for a ride in his airplane.
So to get back to headrests, the issue isn’t trying to protect the occupant from the primary collision- though it would be possible to have an impact similar to being rear-ended, the odds would be infinitesimally small. The protection is for the secondary impact that comes when the occupant bounces off of the shoulder harnesses and back into his seat. The headrest has a relatively small investment of cost, weight, and building complexity. As for operational impact, I’d argue that it actually improves operations (depending on the design). My primary area of concern for operational impact is the space that the headrest takes up in the cabin. I didn’t really want it to stick up above the seat, since it would be in the way at times. In the back seat, the headrest would actually protrude into the baggage area somewhat. While I was pondering these points, I found myself riding in a minivan- it was a late model dodge caravan. Here is what the back seat headrests look like:
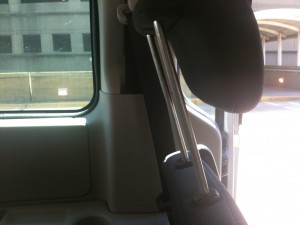
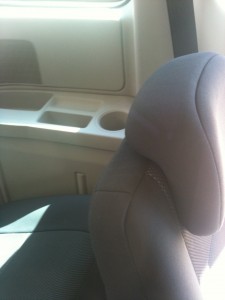
The only thing better than coming up with a good idea is copying someone else’s great idea, so I called the local junkyards to start looking for a set of 4 late model caravan headrests. Everyone that I spoke with wasn’t interested in selling just a headrest, since they want to hold out and sell the whole seat instead. This issue combined with the desire on my part to keep the weight down led me to just plan on new fabrication instead.
I started by ordering some 4130 tubes. The vertical supporting tubes have a 1/2″ inner diameter (or so), so the 1/2″ OD tubes that make up the headrests themselves can fit in there with a little bit of wiggle. In retrospect, I wish I’d chosen a thinner diameter tube for the vertical, realizing that a little bit more clearance between the telescoping tubes wouldn’t have been a big problem.
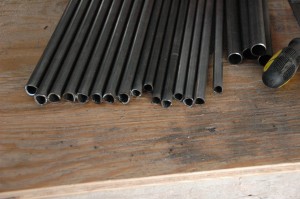
Here is the result of some time with a plumbing-style tube cutter – not pictured: sore wrists:
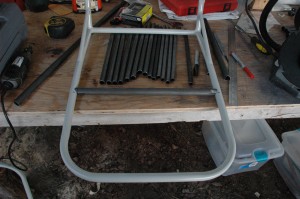
Having watched Tinman’s awesome videos about welding, I had been told that the easiest way to cut the fishmouth shape in the tubes was to use a bench grinder and an eyeball. The grinder is for shaping the tube, and the eyeball is for knowing when it is right. I was sold on the idea, though when I talk to people who haven’t built with tubing before, they think that they will certainly need some sort of tube cutting tool. I guess the whole idea of having to make the curved cuts is very intimidating, with further evidence being the money that some builders spend on CNC cut tubes. I figured that this would be a great way to try out the grinder/eyeball combination, since neither the vertical headrest supports nor the receiving tubes were length-critical. In fact, I had left both intentionally long with plans to cut them later. If I needed to start over with a new fishmouth, it wouldn’t be an issue.
The truth is that after one or two tubes, I felt like I had it down. I would just grind it until it looked about right, then test fit, then grind a bit more if necessary. Something that makes it easier is that the welding process can certainly tolerate a 1/16″ gap, so the pieces don’t really have to fit together with CNC accuracy. Level 2 of difficulty was to cut the horizontal tubes that go between the original seat verticals, since the fishmouths have to be cut not just to a 3/4″ diameter, but they must also be cut parallel to each other and positioned to account for the distance between the seats. I did have to redo one of these pieces, simply because I cut the fishmouth 90 degrees off. In the videos they said that I would do that before too long.
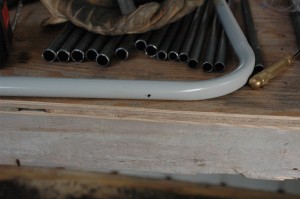
To locate the vertical tubes, I found and marked the left-right center of the tube that makes up the top of the seat back. This was a little bit tricky, since the tube has such a nice big radius. Working out from the centerline, I marked the holes for the receiving tubes at 6″ center to center. I drilled with a small pilot hole first, as you can see below. This hole was sort of high stress emotionally, since it was the point of no return on some pretty expensive parts.
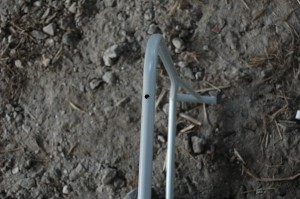
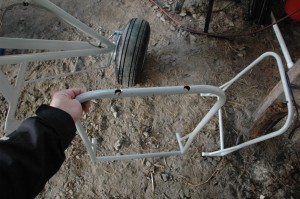
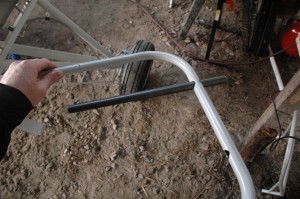
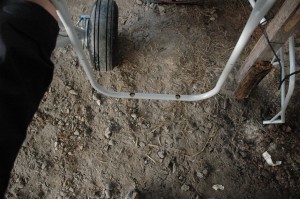
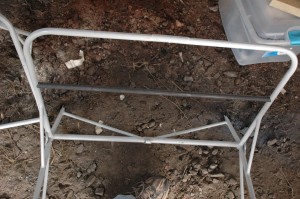
This was an enjoyable process, but it was getting too cold to weld in the hangar. Since the 4130 tubing has to cool at just the right rate, a cold workshop creates undesirably hardened welds that can be subject to cracking. I don’t really have any way to warm up the hangar, so I took the tanks and all of these parts home so that I could weld them in the smaller workspace there.